How to Make a ChatGPT Plugin With Go and Gin
ChatGPT plugins provide a new medium for developers to take advantage of OpenAI’s powerful GPT-4 model. plugins give ChatGPT access to tools via a REST API. When a plugin is installed in a user’s ChatGPT session, the model may decide to use the plugin as a part of it’s response.
You can develop plugins that enable ChatGPT to plan travel, go shopping, or do complex mathematics. In this tutorial, you’ll learn the basics of developing a ChatGPT plugin using Go and Gin.
This tutorial assumes you have Go installed. For information about how to create a plugin in other languages, see:
- How to make a ChatGPT plugin with Rust
- How to make a ChatGPT plugin with Elixir
- How to make a ChatGPT plugin with Ruby on Rails
- How to make a ChatGPT plugin with Python and FastAPI
- How to make a ChatGPT plugin with TypeScript and Express
Step 1: Set up the Go project
Create a new Go project with module support by running:
mkdir go-chatgpt-plugin
cd go-chatgpt-plugin
go mod init go-chatgpt-plugin
Next, install the Gin server with go get:
go get -u github.com/gin-gonic/ginThen, create a new file main.go and add the following:
package main

import (
  "net/http"

  "github.com/gin-gonic/gin"
)

func main() {
  r := gin.Default()
  r.GET("/ping", func(c *gin.Context) {
    c.JSON(http.StatusOK, gin.H{
      "message": "pong",
    })
  })
  r.Run()
}
This will create a new Gin server which serves a single endpoint /ping from localhost:8080. You can verify your server works by running:
go run main.goand navigating to localhost:8080. You will see:

Success! Now you’re ready to create the plugin API.
Step 2: Create the plugin API
ChatGPT interacts with plugins via a defined REST API. To start defining your REST API, create a new route in main.go:
  r.GET("/api/hello", func(c *gin.Context) {
    c.JSON(http.StatusOK, gin.H{
      "message": "Hello from the plugin!",
    })
  })
This will create a new route at /api/hello will return a JSON response from the server with the message Hello from the plugin!. Your entire main.go will look like this:
package main

import (
  "net/http"

  "github.com/gin-gonic/gin"
)

func main() {
  r := gin.Default()
  r.GET("/ping", func(c *gin.Context) {
    c.JSON(http.StatusOK, gin.H{
      "message": "pong",
    })
  })
  r.GET("/api/hello", func(c *gin.Context) {
    c.JSON(http.StatusOK, gin.H{
      "message": "Hello from the plugin!",
    })
  })
  r.Run()
}
With your API defined, you need to define an OpenAPI Spec.
Step 3: Create the OpenAPI Spec
The OpenAPI Spec is how your ChatGPT plugin knows which endpoints are available to interact with. ChatGPT will use your OpenAPI spec to structure its requests and parse the responses from your plugin. For your Go plugin, create a new folder public and add a new openapi.yaml file to the directory. Open up openapi.yaml and add the following:
openapi: 3.0.0
info:
  title: Go ChatGPT Plugin
  version: 1.0.0
servers:
  - url: http://localhost:8080/api
paths:
  /hello:
    get:
      summary: Say hello
      description: Says hello from the plugin
      responses:
        "200":
          description: OK
          content:
            application/json:
              schema:
                type: object
                properties:
                  message:
                    type: string
      operationId: sayHello
This spec defines your single /hello endpoint which is available from the url http://localhost:8080/api/hello. Now you’re ready to define the ai-plugin.json for your Go plugin.
Step 4: Create the plugin manifest
Every ChatGPT plugin must ship with a plugin manifest hosted on the same domain as the API. ChatGPT looks for the plugin specifically at the path /.well-known/ai-plugin.json. You can read more about the specifics of the plugin manifest in our What is the ChatGPT plugin manifest? post.
For your plugin, start by creating a new directory public/.well-known. Next, create a new file in that directory called ai-plugin.json. Then, add the following to ai-plugin.json:
{
  "schema_version": "v1",
  "name_for_human": "My First plugin",
  "name_for_model": "go_plugin",
  "description_for_human": "My first ChatGPT plugin",
  "description_for_model": "plugin which says hello.",
  "auth": {
    "type": "none"
  },
  "api": {
    "type": "openapi",
    "url": "http://localhost:8080/openapi.yaml",
    "is_user_authenticated": false
  },
  "logo_url": "http://localhost:8080/logo.png",
  "contact_email": "support@example.com",
  "legal_info_url": "http://www.example.com/legal"
}
In this example, the “auth” field is set to “none” because this plugin doesn’t require authentication. However, depending on your use case, you might need your plugin to handle authentication. For more information about how to implement authentication in a ChatGPT plugin, you can refer to our ChatGPT Plugin Authentication Guide.
Now you need to set your application up to serve the static openapi.yaml and .well-known/ai-plugin.json. You can do so by editing main.go to serve your static assets in the public directory:
  r := gin.Default()
  r.StaticFile("/openapi.yaml", "./public/openapi.yaml")
  r.StaticFile("/.well-known/ai-plugin.json", "./public/.well-known/ai-plugin.json")
  // ... rest ...
And that’s all you need! You can verify it worked by starting your server and accessing both files from the browser.
Step 5: Set up CORS middleware for development
In order to test your plugin locally before deploying to production, you need to configure your application to allow Cross-Origin Resource Sharing (CORS) from the ChatGPT website. CORS enables ChatGPT to request access to resources from your locally running webserver. To setup CORS with Go and Gin you can use the Gin CORS package. First, install the cors package with go get:
go get github.com/gin-contrib/corsThen add the dependency to main.go:
import (
  "net/http"

  "github.com/gin-gonic/gin"
  "github.com/gin-contrib/cors"
)
Finally, add a CORS configuration to your Gin router:
  r.Use(cors.New(cors.Config{
    AllowOrigins:     []string{"https://chat.openai.com"},
    AllowMethods:     []string{"GET", "POST"},
    AllowHeaders:     []string{"*"},
  }))
This will configure CORS correctly in your application for local development. Now you’re all set for testing!
Step 5: Install and test your plugin
First, start your plugin server locally by running:
go run main.goYou can verify it worked by navigating to http://localhost:8080/ping in your browser:
Next, navigate to the ChatGPT UI and select the plugin model:

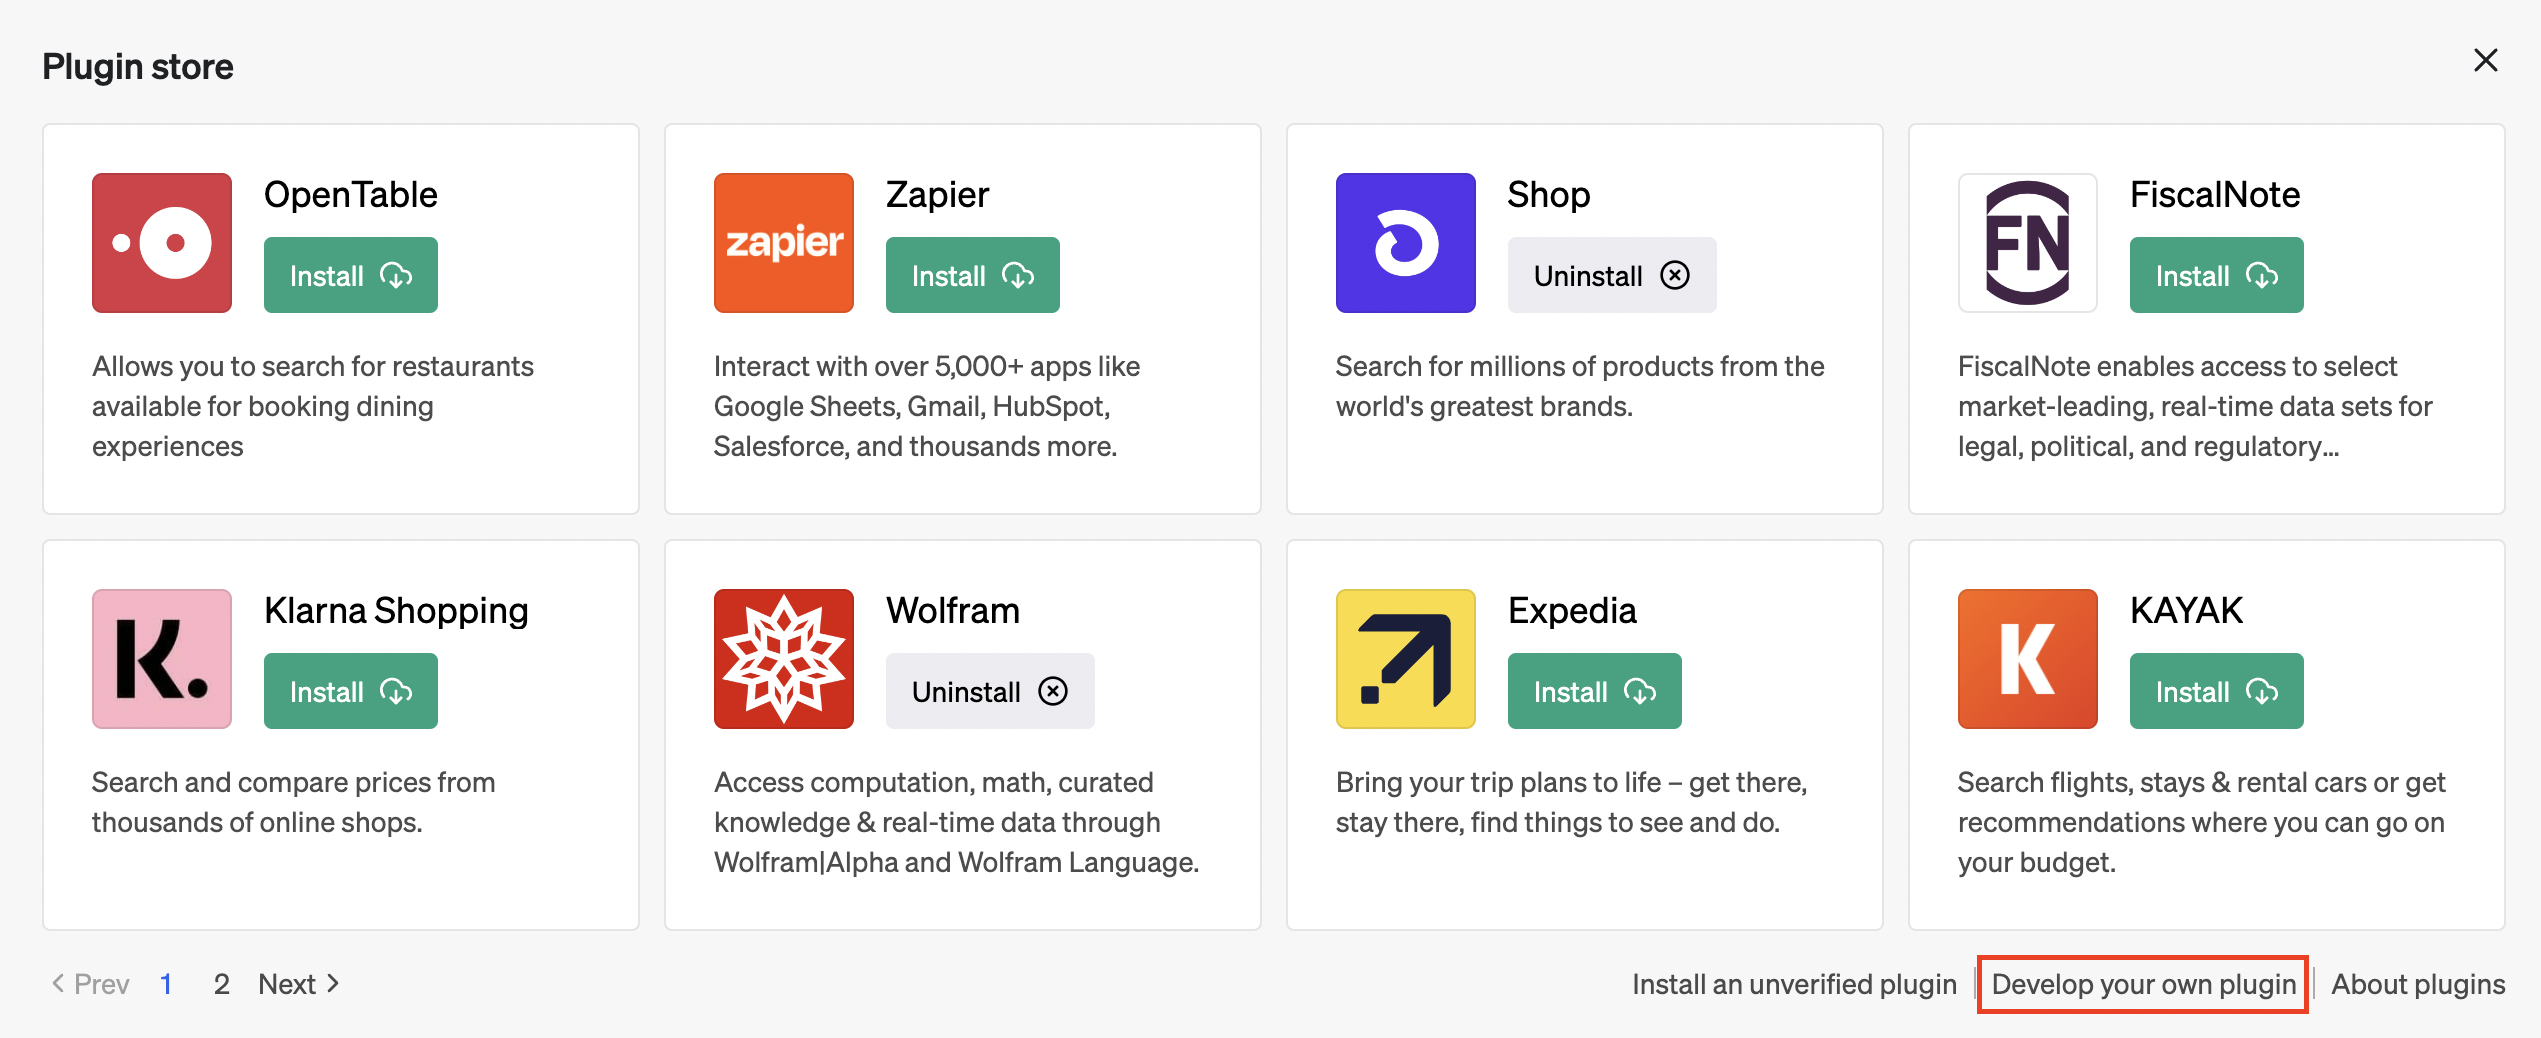
Then, you’ll want to select the plugins dropdown, navigate to the plugin store, and click “Develop your own plugin” in the bottom right:
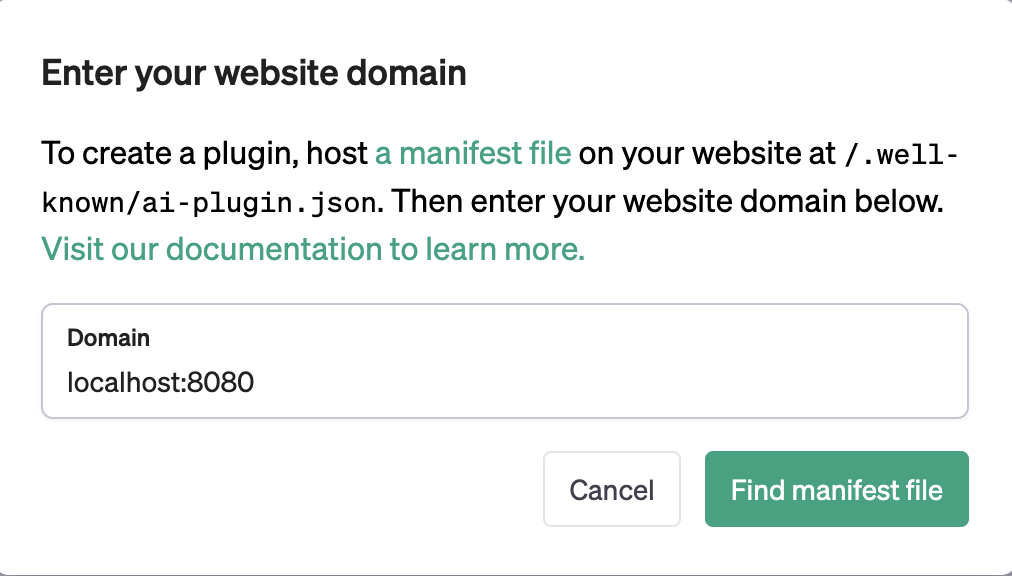
Finally, type your localhost URL into the plugin form:
After awhile, you’ll see the following:
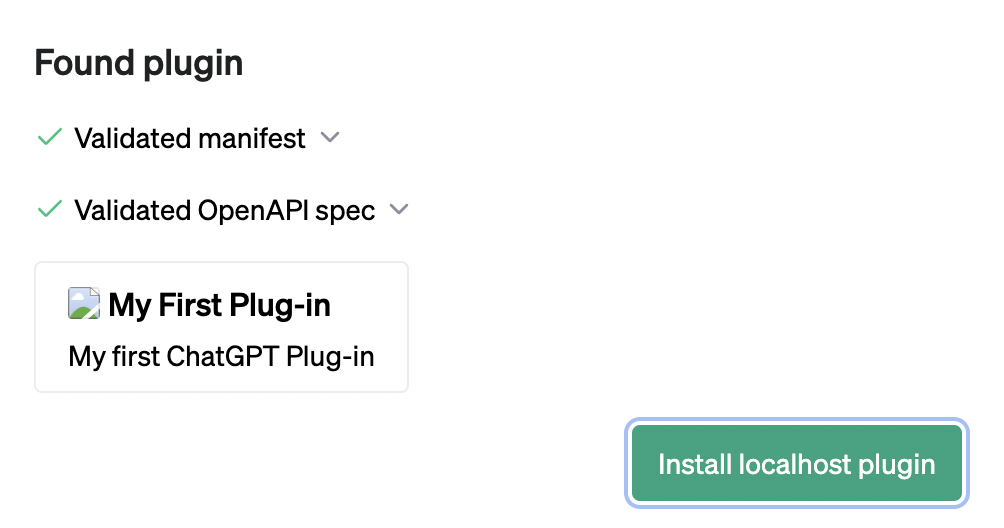
Click “Install localhost plugin” to continue. With your plugin enabled, you can start to interact with it using ChatGPT. For example, try typing in “Say hello from my plugin” into the chat window:
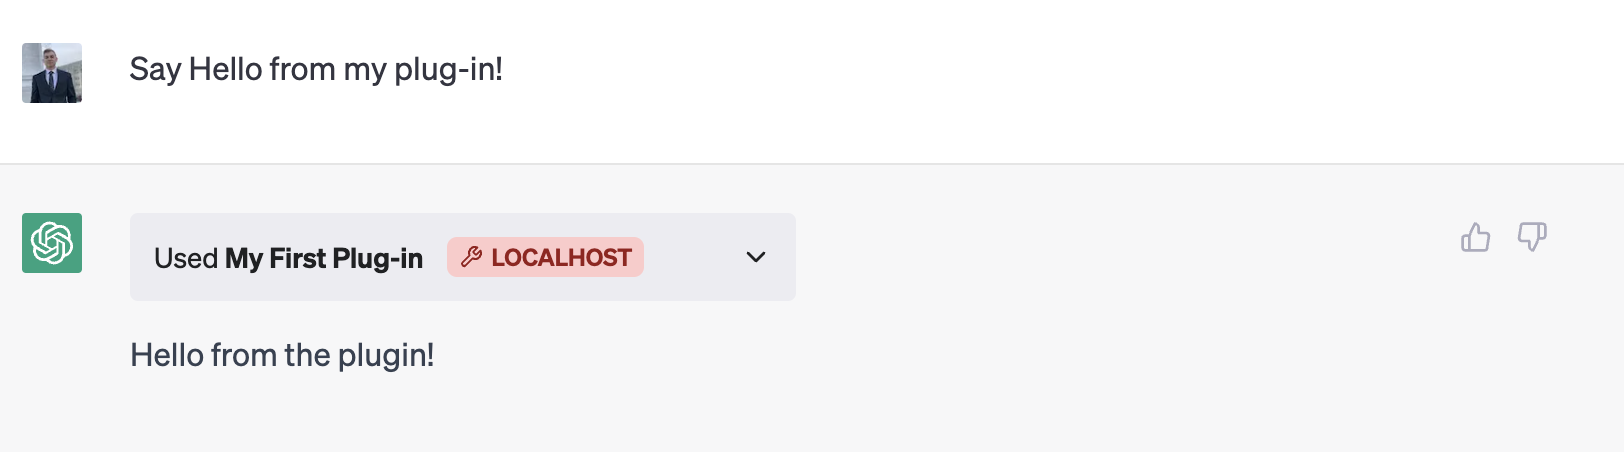
Congratulations! You’ve successfully made your first ChatGPT plugin with Go and Gin and confirmed it works locally. Next, check out our deployment and hosting guide to learn about deploying your plugin to production.
Enjoyed this post?
Subscribe for more!
Get updates on new content, exclusive offers, and exclusive materials by subscribing to our newsletter.